Access Your Local Network Remotely - A Complete Guide
Learn how to access your local network remotely without port forwarding or VPNs. Step-by-step guide using secure tunneling for home servers, RDP, SSH, and IoT.
Accessing your home network remotely has become essential for developers, remote workers, and anyone managing systems outside their physical location. Whether you’re reaching a local server, testing applications, or controlling devices at home, the ability to connect from anywhere is no longer optional. The problem is that traditional approaches - port forwarding, VPNs, dynamic DNS - introduce setup complexity, security risks, and ISP limitations that make them frustrating to maintain.
In many cases the challenge isn’t the access itself, but how complicated it is to configure and keep working. Modern tunneling tools like LocalXpose simplify this by creating a secure outbound connection between your local environment and the public internet, letting you access specific services without exposing your entire network or touching your router.
Access Local Network Remotely: Quick Overview
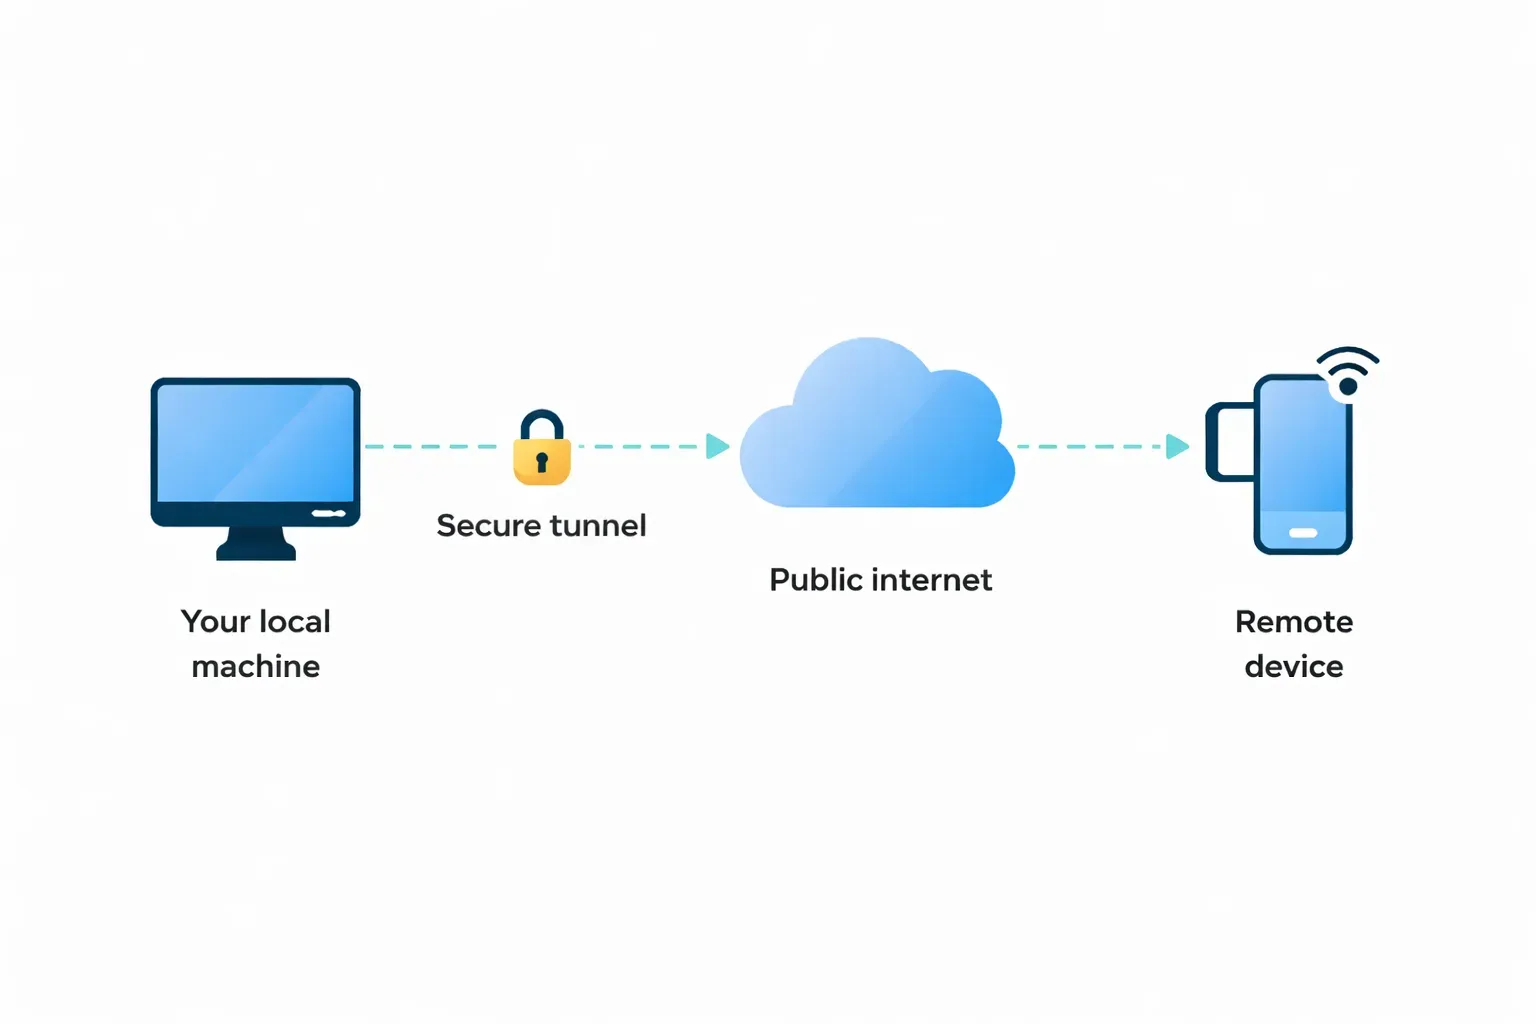
To access your local network remotely, you need a way to reach a service running on a private machine from the public internet. The traditional approach uses port forwarding or a VPN, both of which require router configuration and don’t work well behind CGNAT. The modern approach uses a secure tunnel that establishes an outbound connection from your local machine and exposes only the specific service you want to share.
The basic workflow looks like this:
- Run your local service (web server, SSH, RDP, IoT dashboard) on its usual port.
- Install a tunneling client like LocalXpose on the same machine.
- Authenticate the client and start a tunnel pointing to your local port.
- Use the public URL the tunnel returns to reach your service from anywhere.
- Stop the tunnel when access is no longer needed.
Read on for the full setup, real-world use cases (home server, RDP, SSH, Raspberry Pi, IoT), and troubleshooting tips.
Why Remote Access to a Local Network Is Hard
Remote network access means connecting to devices or services inside a private network from an external location over the internet. In practice, this is interacting with a system on your home network as if you were physically there - a web server, a development environment, a connected device, a remote desktop session.
The reason it’s harder than it sounds is that home networks are designed to be private. Your router performs NAT, your ISP may use CGNAT (which shares one public IP across many subscribers and blocks inbound connections entirely), and most home connections use dynamic IPs that change without warning. Traditional solutions work around these constraints, but each has trade-offs:
- Port forwarding opens a specific port on your router and maps it to an internal device. It’s free but exposes the service directly to the public internet, doesn’t work behind CGNAT, and breaks every time your public IP changes.
- VPN creates a private network between your devices, but requires server setup, client configuration on every device, and ongoing maintenance. It’s also overkill when you only need to reach one service.
- SSH tunneling works for technical users but still requires a reachable SSH server somewhere, which puts you back at the port forwarding problem.
Modern tunneling solutions take a different approach: instead of opening a path inward, they establish an outbound connection from your local machine to a public edge server, then route external traffic back through that connection. Because the connection originates from inside your network, there’s no router configuration, CGNAT works fine, and you only expose the specific service you choose.
How LocalXpose Simplifies Remote Network Access
LocalXpose removes manual network configuration entirely. Instead of opening ports, it creates a secure outbound connection from your local machine to its edge servers. You can expose a specific service - a web server, SSH endpoint, or remote desktop port - without exposing the rest of your network.
This works reliably across environments where traditional methods fail. Whether your network is behind a corporate firewall, on a dynamic IP, or restricted by CGNAT, the outbound connection still establishes because it’s just normal outgoing traffic. Public endpoints are generated automatically and secured with TLS, so you don’t manually configure HTTPS or manage certificates.
You also get granular control. Instead of granting access to your entire network like a VPN does, you choose exactly which service to expose and revoke access by stopping the tunnel. That’s a narrower attack surface than port forwarding and a simpler model than running a VPN server.
Real-World Implementations Using LocalXpose
Understanding remote access becomes more practical with real scenarios. Instead of exposing your entire network, the more effective pattern is to selectively expose only the services you need.
Accessing a Home Server from Anywhere
Many users run services locally - dashboards, file servers, internal tools - and hit a wall when trying to reach them from outside the home network. With LocalXpose you can expose a single service running on your home server and access it through a secure public endpoint, without port forwarding or dealing with dynamic IP changes. You stay in control of what’s exposed and can stop the tunnel the moment you don’t need it.
Accessing a Local Development Environment
Developers often need external access to applications running on localhost - particularly when testing webhooks locally, integrating third-party APIs, or sharing in-progress work with clients. Instead of deploying just to make something accessible, LocalXpose lets you expose your local environment instantly, with a stable public URL that external services can reach.
Remote Desktop Access Without Router Configuration
Accessing your personal computer remotely is a common requirement, but traditional setups rely on port forwarding, which is brittle and exposes RDP directly to the internet (a common attack target). LocalXpose creates a secure tunnel to your machine instead, so you can connect remotely without modifying router settings. For more on the traditional approach and its limitations, see the RDP port forwarding guide.
Secure SSH Access to Your Home Machine
SSH is one of the most common ways to reach a machine remotely, especially for developers and sysadmins. Exposing SSH directly over the internet usually means port forwarding plus aggressive bot traffic hammering your endpoint. With LocalXpose you tunnel SSH through an outbound connection instead of opening port 22, which reduces your attack surface and works in networks where inbound access is blocked.
Accessing Raspberry Pi and Home Lab Devices
Devices like Raspberry Pi are widely used for home automation, dev environments, and lightweight servers. Reaching them remotely usually requires static IP configuration or port forwarding, which isn’t always possible. LocalXpose creates a reverse tunnel that makes the device accessible from anywhere, even behind CGNAT or restrictive ISP setups. For a complete walkthrough, see the Raspberry Pi remote access guide.
Accessing IoT Devices and Smart Systems
Modern home networks increasingly include IoT devices - cameras, sensors, automation hubs - that are designed to operate locally and aren’t easily reachable from outside. Using LocalXpose you can securely expose the interface of a specific device or service, monitor and control it remotely, and keep the rest of your network private. For more on this use case, see the IoT device remote access guide.
Temporary Access for Collaboration and Testing
Sometimes remote access is only needed temporarily - sharing a local tool with a teammate or demoing a feature to a client. LocalXpose lets you generate temporary endpoints that can be shared and revoked easily, with no permanent change to your network configuration. That makes it well suited to short-term access and ad-hoc testing.
Setting Up Remote Access with LocalXpose
Setting up remote access with LocalXpose is fundamentally different from traditional approaches because it relies on reverse tunneling instead of inbound connections. Rather than exposing your network through router configuration, LocalXpose establishes an outbound, persistent connection from your local machine to its edge servers, which then route external traffic back to your local service.
Step 1: Install LocalXpose
Before creating a tunnel, install the LocalXpose client on the machine hosting the service. LocalXpose is cross-platform and supports Windows, macOS, Linux, and containerized environments. Install it using your preferred method:
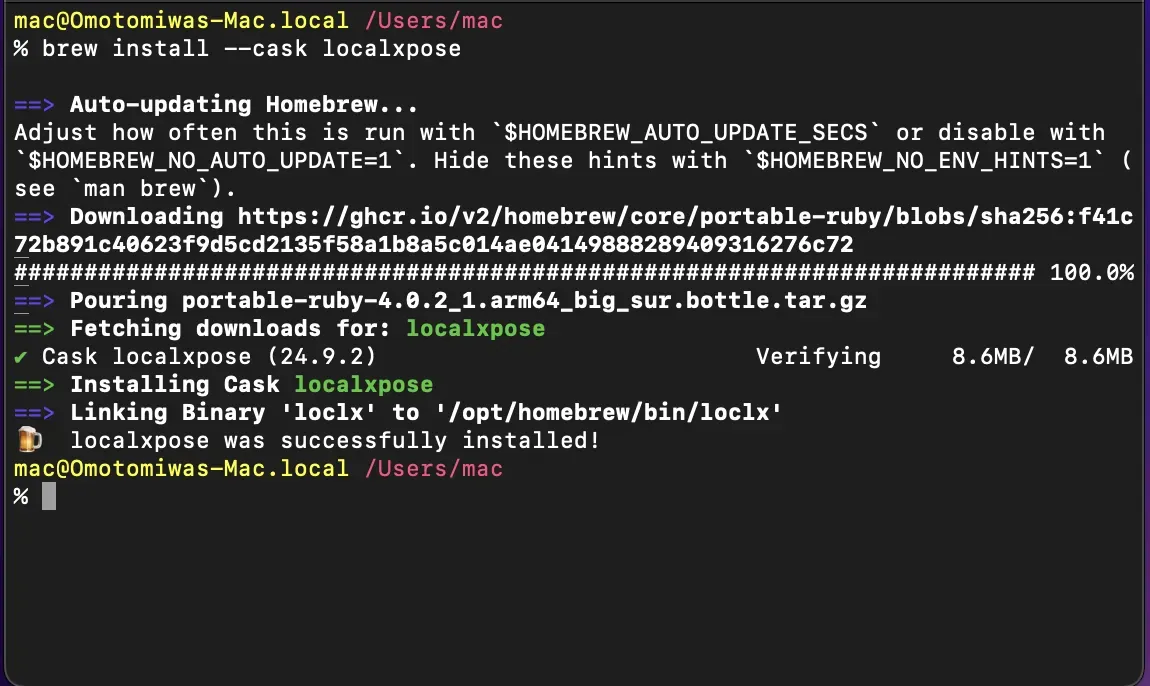
# macOS (Homebrew)
brew install --cask localxpose

# Linux (Snap)
sudo snap install localxpose

# Node (NPM)
npm install -g loclx

# Windows (Chocolatey)
choco install localxpose
These commands install the loclx CLI through your platform’s standard package manager.
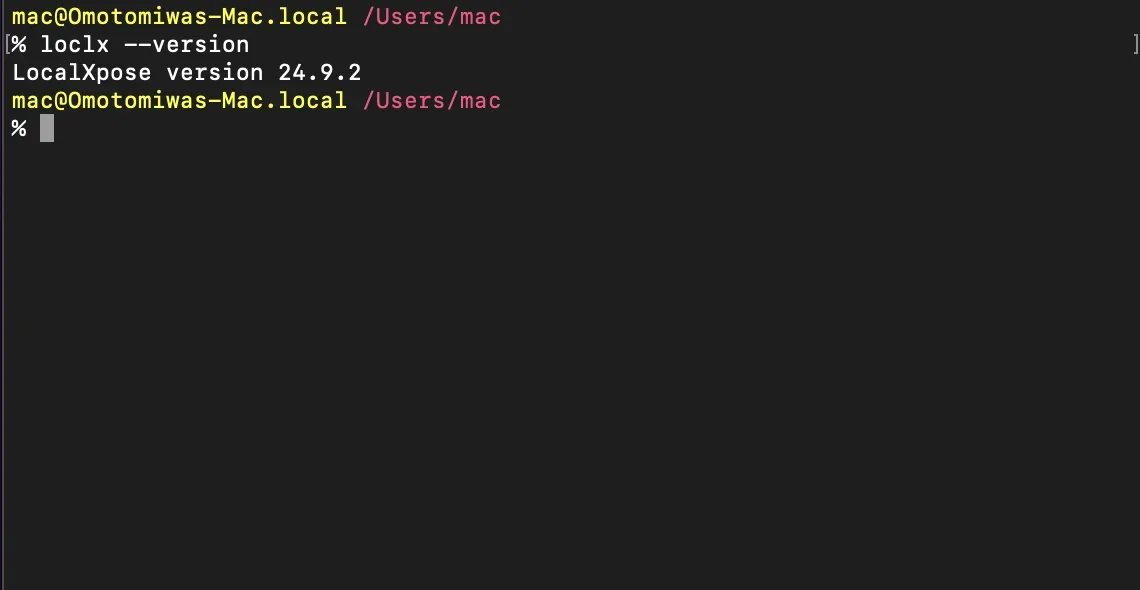
Then verify the installation:
loclx --help
# or
loclx version
If you see help text or a version number instead of a “command not found” error, the CLI is installed correctly.
Alternatively, you can download the binary directly from the official site and run it locally.
Step 2: Authenticate Your Client
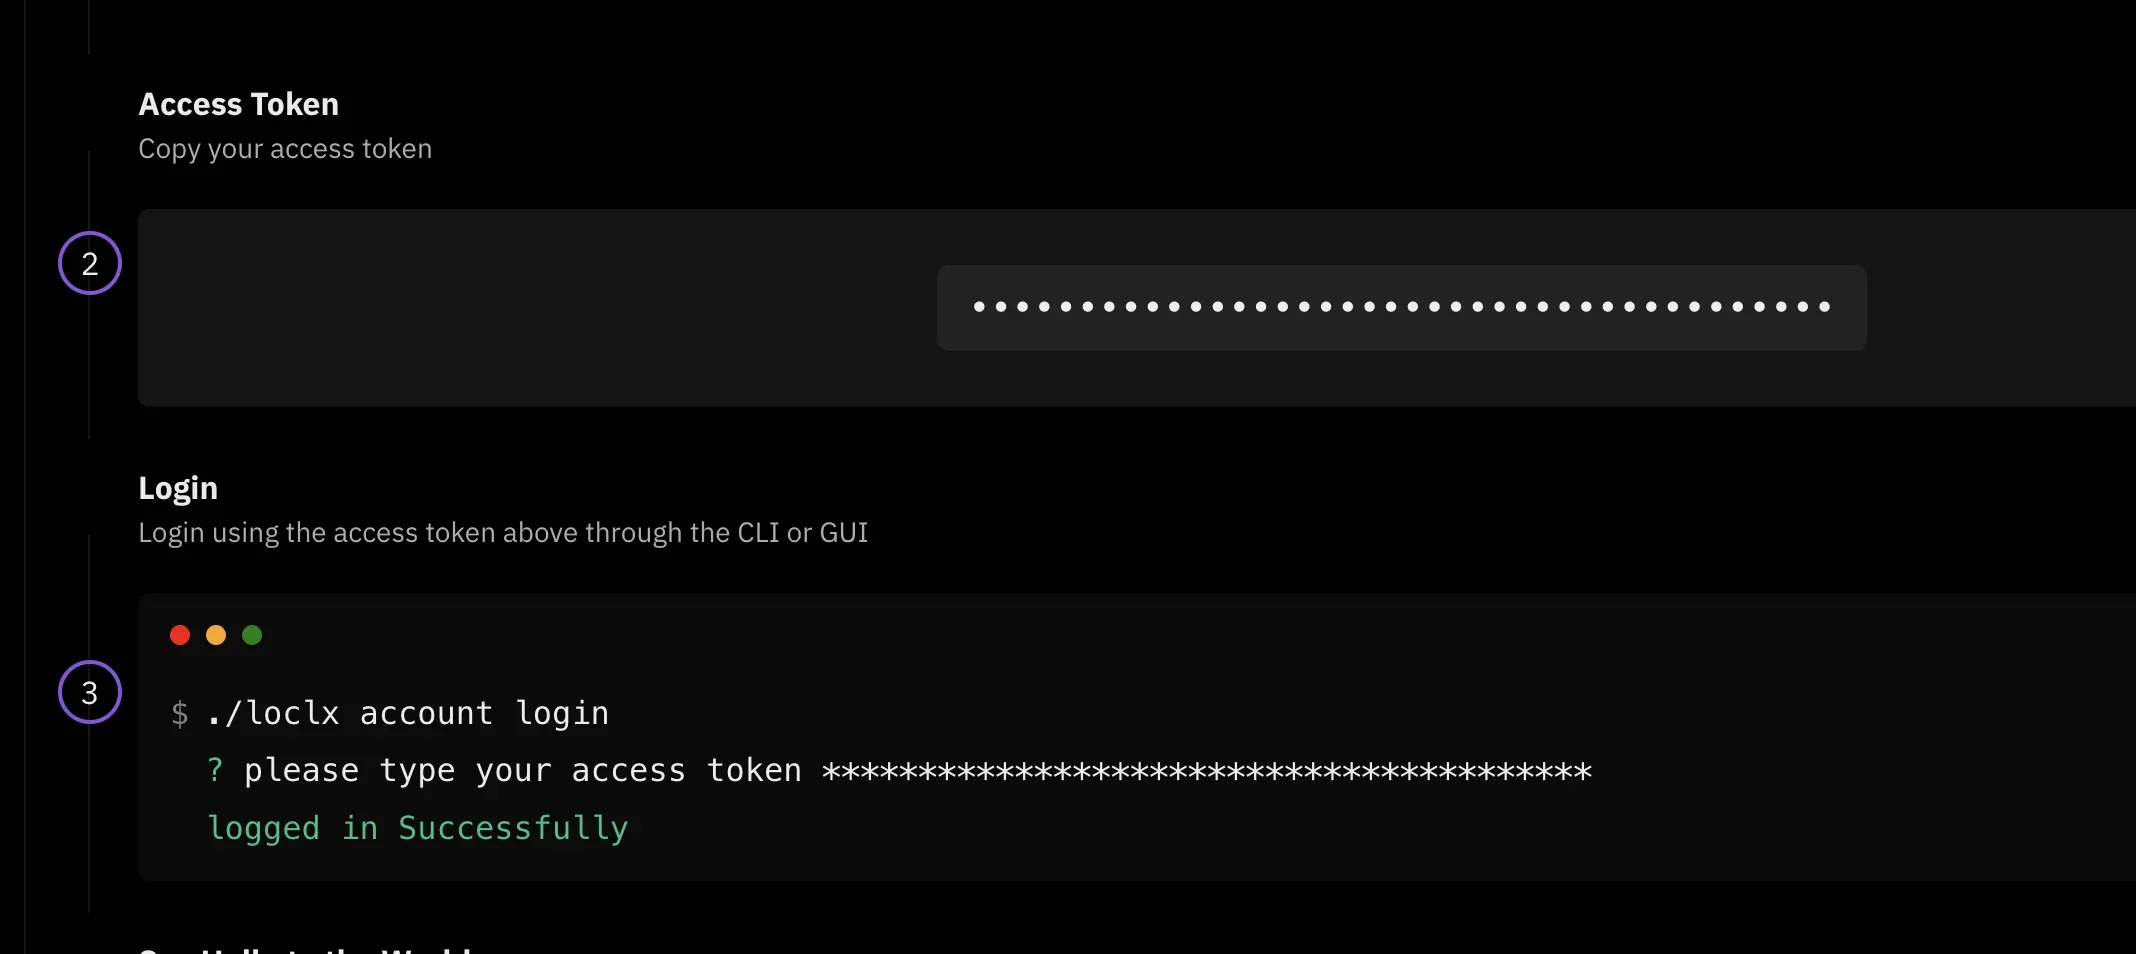
Once installed, authenticate the client to associate it with your LocalXpose account:
loclx account loginThis step establishes identity and ensures that all tunnels you create are securely linked to your account.
Note: Before running this command you need a LocalXpose account, since you’ll be prompted for the access token from your dashboard.

Step 3: Create a Tunnel to a Local Service
After authentication, create a tunnel that maps a public endpoint to your local service. For example, exposing a web application running on port 3000:
loclx tunnel http --to localhost:3000This command creates an HTTP tunnel forwarding all traffic from a public LocalXpose URL to your local service on port 3000.
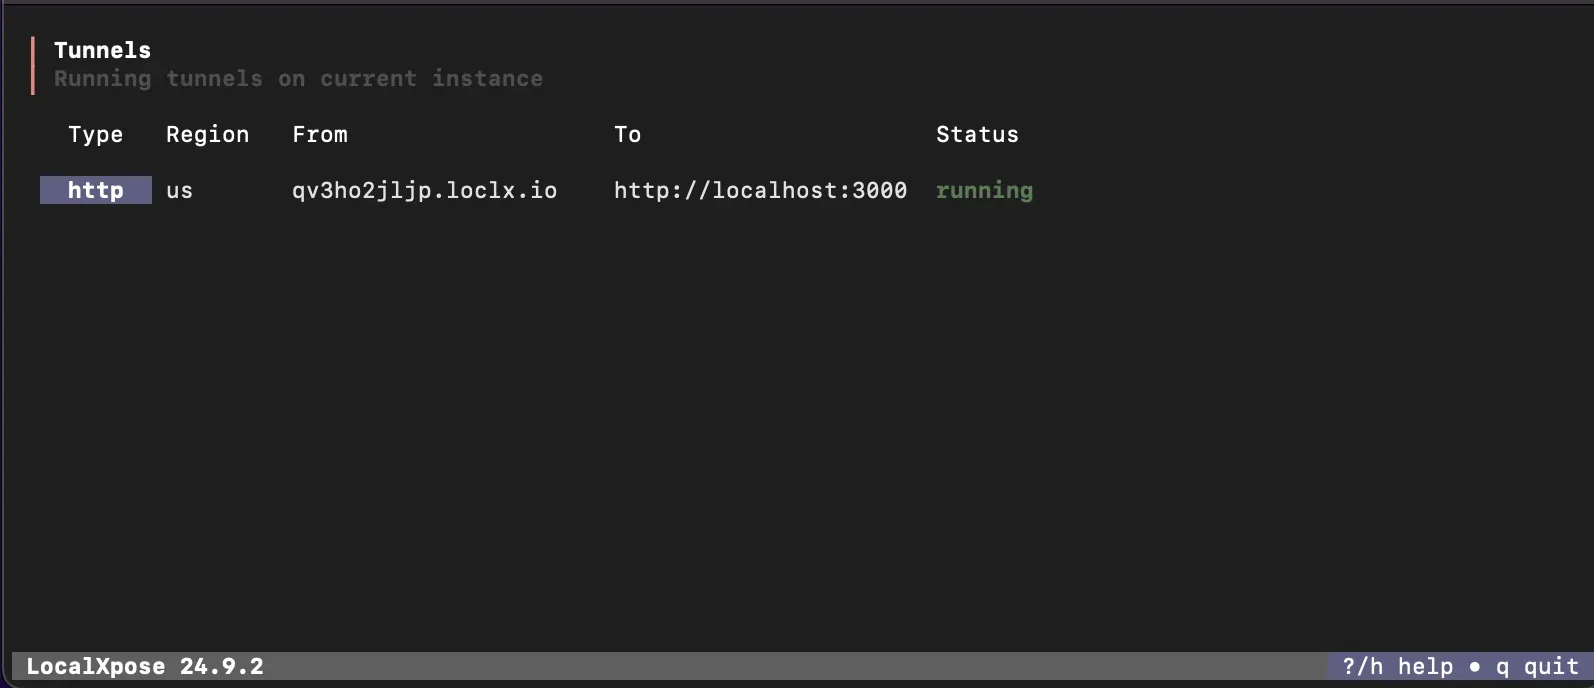
When the command runs:
- A persistent outbound connection is established
- A public URL is assigned (typically a
.loclx.iosubdomain) - Incoming requests are forwarded to
localhost:3000
This effectively exposes your local service to the internet without modifying your router configuration. For more detail on what’s happening under the hood, see the local tunnel overview.
Step 4: Access the Service Remotely
Once the tunnel is active, LocalXpose generates a public endpoint (e.g., a .loclx.io URL). Any
request sent to this endpoint is routed through the established tunnel back to your local machine.
Open the URL in a browser, hit it from another device, or share it with a teammate - the request
lands on the same local service that’s running on your laptop.
Step 5: Exposing Non-HTTP Services (TCP Tunneling)
LocalXpose also supports TCP tunnels for services like SSH, remote desktop, or databases:
loclx tunnel tcp --to localhost:22This creates a secure entry point to your SSH service without exposing port 22 directly on your network. Use the same pattern for RDP (port 3389), PostgreSQL (5432), or any other TCP-based service.
Security Considerations for Remote Network Access
When setting up remote access to your home network, security should be a top priority. A few practices worth following:
- Use strong authentication. Protect exposed services with proper authentication, especially for sensitive endpoints like admin panels or SSH. Never rely on the tunnel alone to gate access.
- Encrypt all traffic. LocalXpose handles encryption at the tunnel level, but sensitive data should still be secured at the application level (HTTPS, TLS for databases, etc.).
- Limit what you expose. Only tunnel the services you actually need. Avoid exposing multiple endpoints or entire systems unnecessarily.
- Keep software updated. Regularly update LocalXpose and your local services to patch vulnerabilities.
- Monitor access and usage. Review active tunnels and access activity periodically, and stop any tunnels you’re no longer using.
LocalXpose includes built-in features like encrypted tunnels, IP whitelisting, and basic auth that make it easier to apply these practices without complex configuration.
Troubleshooting Common Remote Access Issues
When setting up remote access, you may run into issues that prevent your service from being reachable. Most problems trace back to configuration, network restrictions, or the local service itself.
- Local service not running. Verify the service you’re trying to expose is actually active and
reachable locally (test with
curl http://localhost:portor open it in your browser). - Incorrect port or address. Double-check that the tunnel points to the correct local port and service.
- Tunnel not active. Make sure your LocalXpose tunnel is still running and hasn’t been
disconnected. The tunnel only works while the
loclx tunnelcommand is running. - Firewall or network restrictions. Some environments block outbound connections, preventing the tunnel from establishing. Try a different network or hotspot to confirm.
- Invalid or expired endpoint. If the generated URL stops working, restart the tunnel to get a new endpoint - or reserve a subdomain so the URL stays stable across restarts.
- Service binding issues. Ensure your local service is bound to the right interface
(
localhostvs0.0.0.0) for your setup. Some apps only listen on127.0.0.1by default.
Most remote access issues come down to verifying the local service, confirming the tunnel is active, and checking for network restrictions. Because LocalXpose relies on outbound connections, it sidesteps many of the common problems associated with traditional methods like port forwarding.
Conclusion
Accessing your home network remotely no longer needs to be a complex, infrastructure-heavy process. Traditional methods like VPNs and port forwarding require deep networking knowledge, ongoing maintenance, and can introduce unnecessary security risks - and they fall apart entirely behind CGNAT.
With modern tunneling solutions like LocalXpose, remote access becomes significantly simpler. By establishing a secure outbound connection and exposing only the services you need, you can reach your home server, development environment, or devices from anywhere without modifying your network setup. The shift from network-level access to service-level access gives you better control, improved security, and a more flexible workflow.
Ready to try it? Sign up for a free LocalXpose account and expose your first service in under five minutes.
