
Starlink Port Forwarding: Why It Fails and 3 Ways Around It
Starlink port forwarding fails because of CGNAT and the stock router. Three fixes are a Priority plan public IP, IPv6, or an outbound LocalXpose tunnel.

Port forwarding doesn’t work on standard Starlink connections due to two main issues. The Starlink router lacks a port forwarding page, and the residential and Roam plans use carrier-grade NAT (CGNAT), which means your public IP address is shared with other customers, causing inbound traffic to be dropped.
There are three ways to bypass this issue. You can pay for a Priority-tier plan with a public IP option and use your own router. Alternatively, you can use IPv6 if the connecting device supports it. Another option is to open an outbound tunnel with a service like LocalXpose, which works on any Starlink plan without requiring support.
Key Takeaways
- The Starlink router has no port forwarding interface, and the Standard Residential and Roam plans use CGNAT, making it impossible to forward ports.
- To get a real public IP, you need a Local Priority or Global Priority plan, along with a third-party router in bypass mode.
- IPv6 can bypass CGNAT, but it only works if the client also has IPv6.
- An outbound tunnel like LocalXpose can completely sidestep CGNAT and works on the cheapest Starlink plan.
Why Port Forwarding Fails on Starlink
There are two reasons why you’re having trouble with port forwarding on Starlink.
-
First, your Starlink router doesn’t even have an option for port forwarding, you won’t find any settings for it in the Starlink app or on the router’s website. In fact, Starlink’s own help pages say that port forwarding isn’t supported on their router and that using a third-party router that has a true public IP is the only way around this. This isn’t something that can be fixed by looking for a hidden setting or by updating the router’s software.
-
The second problem is that your connection is being routed through something called a CGNAT (Carrier-Grade NAT). Even if you could set up port forwarding, there still wouldn’t be anything for the ports to forward to. When you’re on a standard Starlink plan, the router gives your household one of a big group of private IP addresses from the 100.64.0.0/10 bunch. These addresses are basically for this exact purpose (they come from a part of the internet that was specifically set aside by an internet governing rule, RFC 6598). But these addresses aren’t accessible from the outside of your home. Since many, many other people are all connected to the same few actual, true public Starlink IP addresses, there is no way for Starlink to know which of those people a random incoming message on the internet is intended for.
How to Check If You’re Behind CGNAT
To see if you’re on a CGNAT, first open the Starlink app and go to settings and then check your network status. Look at where it says WAN or IP address. If your number is between 100.64.0.1 and 100.127.255.254, you have a CGNAT. You can also verify this from any other device connected to your network by checking what your router says your WAN IP is and then searching “what’s my IP” in a web browser. If the two don’t match, something’s changing your address before it goes out onto the net, and for Starlink, that something is a CGNAT.
If your WAN IP looks like a normal one and isn’t in that range, you either already have the setting for a public IP turned on or else it’s because of how IPv6 works.
Option A: Priority Plan + Public IP + Your Own Router
If you want to get around the usual way that Starlink does things with your internet, which is essentially the same as having a real, non-gateway’d IP address, then you’ll need to go for this more expensive and more complicated option. It’s only available on two of their plans: Local Priority and Global Priority. It’s not an option if you’re on the standard Residential or Roam plans. Enabled from your account dashboard, it hands your WAN one real, internet-routable IPv4 address via DHCP instead of a CGNAT one. Two catches: it’s dynamic, not static (Starlink doesn’t offer static IPs), and it can change if you relocate the terminal.
Just having a public IP from Starlink isn’t enough, because the Starlink router still has no port forwarding page. You need to use the bypass option in the Starlink app (found under Settings). If you’re on a Gen 3 router, plug your own router straight into one of the built-in Ethernet ports on the back; Gen 2 routers need a separate Starlink Ethernet adapter to do the same thing.
This is essentially what people are missing. When in bypass mode, your own router gets the public IP and that’s where your port forwarding rules go. Note: switching out of this mode will wipe all settings so you can’t just turn it on and off when you like.
If you want Starlink, Local Priority will set you back $55 a month, according to Starlink’s own pricing information. That’s on par with the cheapest residential plan to start, and it climbs to $155 a month with the larger 500GB data bucket, on top of residential plans that otherwise run $55 to $130 a month. And then you still need to factor in the cost of an Ethernet adapter and a good router on top of that. If you’re just running one or two home servers, that’s a pretty expensive for a feature that can be achieved in other ways. Where it earns the cost is when you specifically need a raw public IP of your own, a high-traffic game server, or equipment that has to answer on a routable address with nothing in the path, this is the only option on Starlink that gives you a true, direct, non-internet-service-provider-in-the-middle type of IP address.
Option B: IPv6
Starlink is a native IPv6 network. You’ll get a /56 block of IPv6 addresses for each Starlink connection, though the prefix isn’t static, Starlink can reassign it, same as the IPv4 side. This also only works on Gen 2 and Gen 3 hardware; the original Gen 1 round-dish router doesn’t support IPv6 at all. This is part of the DHCPv6-PD (Prefix Delegation) service, which is included at no extra charge, no matter what type of plan you have.
If you want to use this, whoever’s connecting to you on the other end also needs IPv6, if they don’t have it, there’s no way around that. Lots of consumer ISPs, including some mobile carriers, still don’t do IPv6 properly, so this really only works for linking two locations you control that both already have it. Even then, this isn’t a fully standalone fix. The stock Starlink router blocks inbound IPv6 by default and has no firewall UI to open it, so just like Option A, you need bypass mode and your own router, one that supports DHCPv6-PD, to actually accept inbound connections. What you skip versus Option A is the Priority plan and public IP add-on; the hardware and bypass setup are the same.
Option C: Skip the Network Entirely with LocalXpose
You have two choices, pay more to Starlink each month or hope that the other end of the connection uses IPv6. There’s a third option that doesn’t involve your Starlink plan, router mode, and CGNAT entirely: an outbound tunnel.
The idea: instead of asking the internet to reach in through your CGNAT’d connection, a small client on your machine opens an outbound connection to a relay server with a real public IP. CGNAT only blocks unsolicited inbound traffic, so outbound connections pass through it without issue. The relay then forwards traffic back down that tunnel to your local service. LocalXpose is built for exactly this. It works on any Starlink plan, including the cheapest Residential tier, needs no Ethernet Adapter or bypass mode, and is usually running inside a few minutes.
Install the client with whichever method matches your platform:
# macOS (Homebrew)
brew install --cask localxpose

# Linux (Snap)
sudo snap install localxpose

# Windows (Chocolatey)
choco install localxpose

# Any platform with Node.js
npm install -g loclx
Sign up for free at localxpose.io, copy your access token from the dashboard, then log in from the terminal:
loclx account login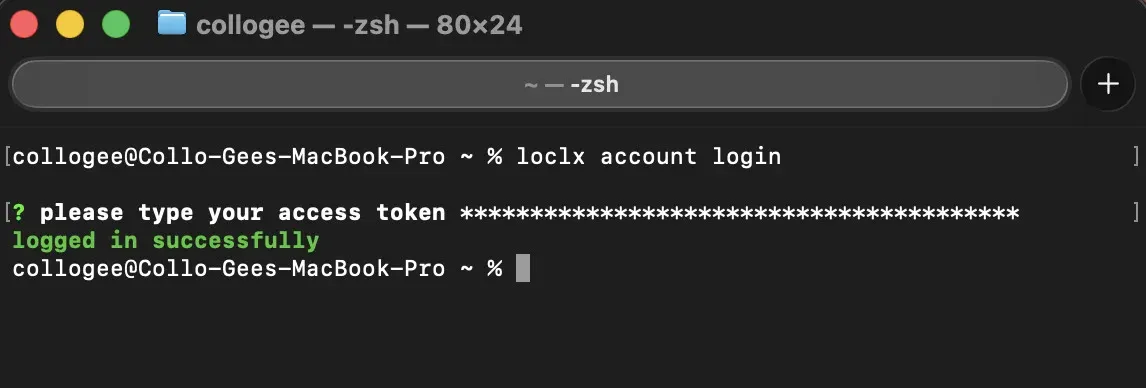
TCP Tunnels (Game Servers, SSH)
For anything that speaks raw TCP such as a Minecraft Java server, SSH, a database you need to reach
remotely, use loclx tunnel tcp:
loclx tunnel tcp --to localhost:25565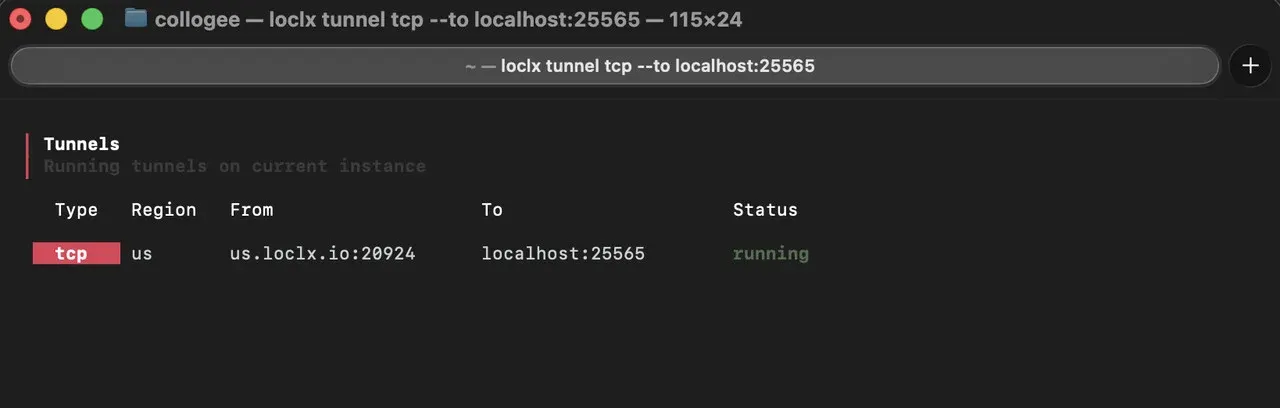
Anyone connects using us.loclx.io:20924 in their Minecraft client. No port forwarding, no public
IP, no bypass mode. SSH works the same way:
loclx tunnel tcp --to localhost:22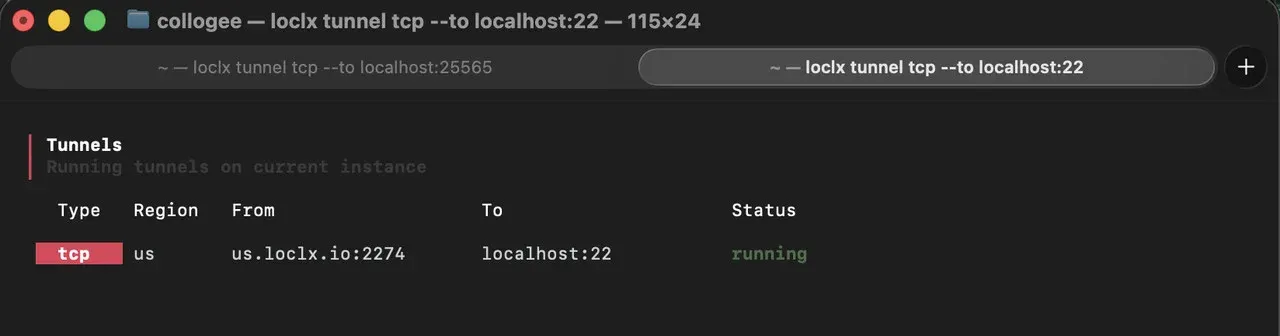
For an endpoint that doesn’t change every time you restart the tunnel, reserve one first and pass it
with --reserved-endpoint.
UDP Tunnels (Minecraft Bedrock, VoIP)
Bedrock and most VoIP traffic run over UDP, which needs its own tunnel type:
loclx tunnel udp --to localhost:19132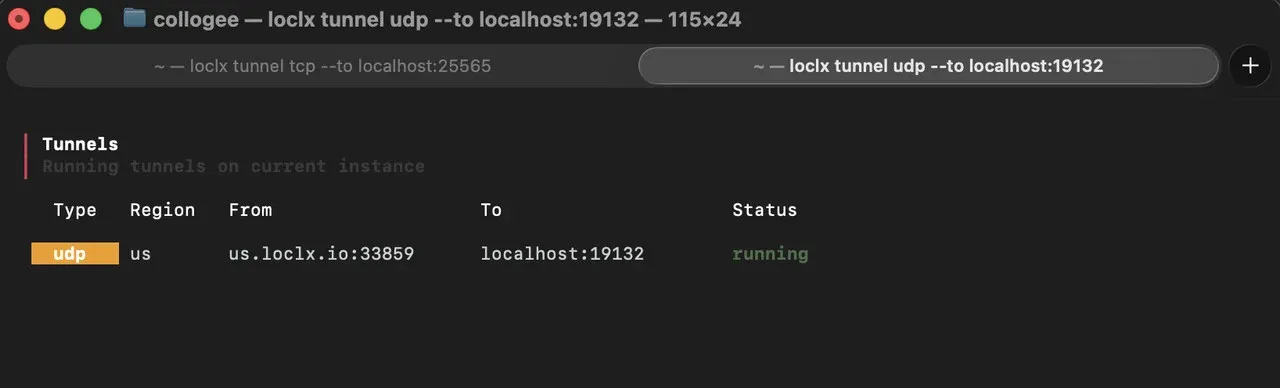
The same command pattern covers a Mumble or other VoIP server, so just point --to at the local
port the service is listening on.
HTTP Tunnels (Dashboards, Web UIs)
For a web-based dashboard, a camera’s admin UI, or a home automation panel, an HTTP tunnel gets you a URL with TLS already handled:
loclx tunnel http --to localhost:8080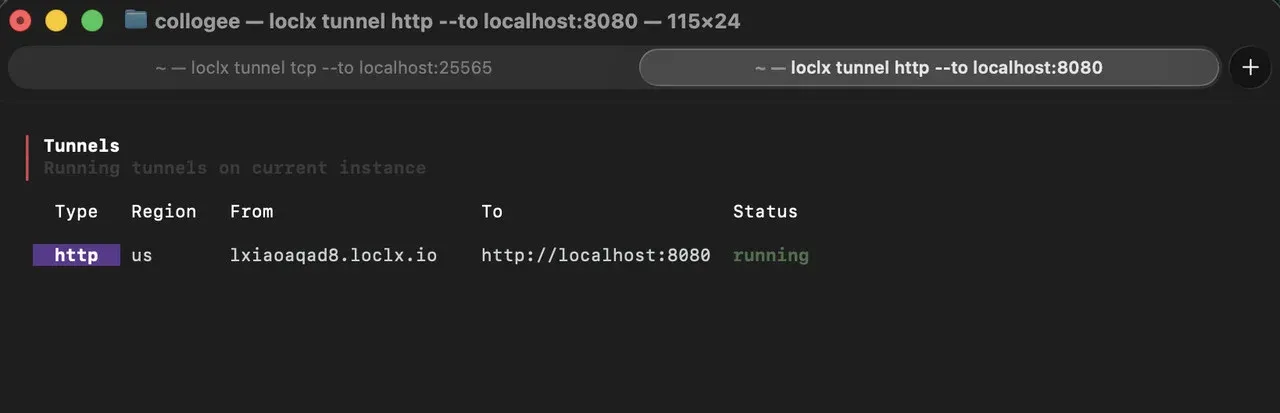
Add --subdomain for a memorable name, or --reserved-domain if you’ve attached your own domain.
This is the cheapest of the three: $8 a month, no hardware, no plan upgrade. It does not give you a public IP that will always be yours; instead, it uses LocalXpose’s relay, which acts as a go between, rather than having a direct connection.
However, for most of the reasons people hit CGNAT in the first place through a game server, remote access to a home server, checking a camera from outside the house, this is a good solution. A tunnel can run as long as you need it to: keep the process up with a service manager and a reserved endpoint, and the address stays the same whether you use it once a week or leave it running year-round.
Which Fix for Which Use Case
| Use case | Protocol | Best fix | Why |
|---|---|---|---|
| Minecraft server (friends only) | TCP/UDP | LocalXpose tunnel | Fastest setup, works on any plan, no extra hardware |
| Gaming server, public/high traffic | TCP/UDP | Priority plan + public IP, or LocalXpose | Needs a stable, direct connection for many concurrent players |
| RDP to a home PC | TCP | LocalXpose reserved TCP tunnel | Avoid exposing RDP directly on a raw public IP; keep strong auth on regardless |
| Security camera / NVR | TCP/HTTP | LocalXpose reserved tunnel, or Priority + public IP | A reserved tunnel stays up 24/7 on any plan; a public IP only makes sense if you already run your own router |
| Home server (Plex, NAS, self-hosted apps) | TCP/HTTP | LocalXpose tunnel | No router changes, works alongside the stock Starlink router |
| Remote site equipment (sensors, PLCs) | TCP | LocalXpose reserved tunnel, or Priority + public IP | Both handle always-on links; the tunnel needs no router swap at the remote site |
Troubleshooting
If you’re still having trouble with Starlink port forwarding even after following Option A, there are three things that could be going on.
- First, make sure Bypass Mode is on because if it’s not, your own router is probably still doing the routing and your manually set up port forward rules on it aren’t going to work. See if the router’s light is violet, if it’s not, then Bypass Mode must not be on. Also, ensure that you’ve turned on the option for a public IP address in your online Starlink account. Note that the settings for Bypass Mode and a public IP are two separate things. Finally, double-check that the ports you’re trying to forward and the type of traffic (eg, which internet protocol) match what your specific service requires, and that the firewall on the device where the service is actually based isn’t stopping it.
- It worked yesterday, but now it doesn’t: Starlink uses a dynamic IP which can change when your internet connection is restarted or if you move your terminal. So, if you’ve set up a domain name or pointed a friend’s game to a specific address, that address is no longer valid because it has changed. To solve this, you need a dynamic DNS client on your router. Alternatively, using a tunneling method won’t have this issue since the local endpoint remains the same and isn’t affected by the changes in your Starlink IP.
- If you plug in another router after your Starlink one without turning off its bypass option, this will essentially create a double NAT. Any ports you try to forward on the second router won’t work since the first one is also translating everything. So you have two choices, either use the bypass feature correctly which will make the first router leave things alone, or change the second one to access point mode which will stop it from doing its own NAT.
Frequently Asked Questions
Does Starlink support port forwarding?
No, not on the standard router or the standard plans. See “Why Port Forwarding Fails on Starlink” above for the two reasons.
Is the Starlink public IP free?
You don’t pay extra for it, this is a feature that comes with certain plans (Local Priority and Global Priority). These plans already cost a bit more than the standard Residential plan, though, so essentially what you’re paying for is the upgraded plan itself, not this specific feature.
Can I host a game server on Starlink?
Yes, two ways. A LocalXpose tunnel gives you a live, accessible address within minutes on any plan, and it can stay up for as long as the server runs. A Priority-tier plan with the public IP option and your own router is the alternative, worth the extra cost mainly for a public server where you want players connecting straight to your own IP with no relay in between.
Does a VPN fix Starlink port forwarding?
Most VPNs don’t really solve the problem and even those that do offer some form of port forwarding using their own servers which essentially adds extra delay and also makes you dependent on whatever rules that VPN company decides to apply. An outbound tunnel built for this, or Starlink’s own public IP option, are more direct fixes.
What’s the difference between bypass mode and a public IP?
You need both, not one or the other. Bypass mode hands routing over to your own router; the public IP is what gives that router something worth forwarding to. See Option A above for the full setup.
Where This Leaves You
Priority plan if you need a raw public IP of your own, IPv6 if both ends already support it, and an outbound tunnel through LocalXpose for everything else, on whatever plan you’re already paying for and for as long as you need it up.
For the gaming case specifically, our guide to port forwarding a Minecraft server covers the Java and Bedrock setup in more detail. And if Starlink isn’t the only connection giving you CGNAT trouble, the same tunnel approach works for T-Mobile Home Internet, which hits an almost identical wall.
