Remotely access IP cameras
In this example, we demonstrate how you can connect securely with TLS encryption and basic user authentication to any IP camera reachable by IP address. This tutorial is applicable to any internet-connected device you have on your own network, whether or not it natively supports authentication or SSL certificates. Whether you're running LocalXpose in Docker or hosting on a Raspberry Pi, we've got you covered.
Simply replace the IP and port in the instructions below to adapt this for your own device.
1. Setup your IP camera
Before we begin, make sure you have your IP camera connected to your network and you can access it on a static address and port. The documentation for your camera will most likely include information about connecting to it over your local network, such as ports, protocols, and any authentication you may need to use.
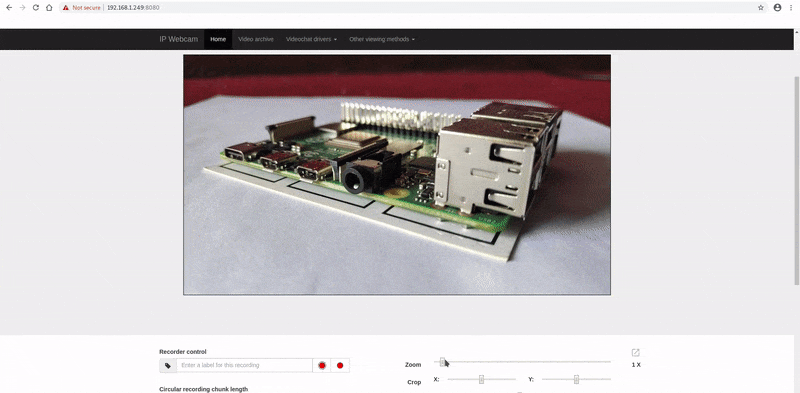
In this example we have verified our feed is accessible via http://192.168.1.249:8080
2. (Optional) Create a reserved subdomain
If you want to use your own domain instead of loclx.io, refer to Create a
custom domain name.
For accessing our camera feed, let's reserve a specific domain for it.
loclx domain reserve --subdomain ipcamera --region aploclx domain reserve --subdomain ipcamera --region ap
✓ Reserving a Domain...
subdomain is reserved -> ipcamera.ap.loclx.ioNow, LocalXpose has provided us with a reserved domain ipcamera.ap.loclx.io.
3. Expose your IP Camera
After we have reserved a subdomain for our IP Camera, we can now go ahead and expose our camera's web feed.
loclx tunnel http --reserved-domain ipcamera.ap.loclx.io --to 192.168.1.249:8080Most IP cameras come with a built-in authentication system. If your camera
doesn't, you can use LocalXpose's basic authentication feature by passing an
option --basic-auth user:pass, as demonstrated below:
loclx tunnel http --reserved-domain ipcamera.ap.loclx.io --to 192.168.1.249:8080 --basic-auth <user>:<password>
✓ Creating HTTP tunnel...

Tunneling http://ipcamera.ap.loclx.io --> 192.168.1.249:8080
Tunneling https://ipcamera.ap.loclx.io --> 192.168.1.249:8080
4. Visit your Camera Feed
Next, we can use the subdomain https://ipcamera.ap.loclx.io to see the camera feed.

5. Operating your video server
Bandwidth
Generally, bandwidth is not an issue for our users. If you are having trouble with playback, consult your camera's documentation to see if you can tune the video bitrate or stream quality settings.
Latency
If you notice any latency, be sure you have chosen the LocalXpose region closest to you when setting up your tunnel.
Uptime
See our docs on the loclx YAML file format and read our tutorial on How to remotely access Raspberry Pi to learn how to run LocalXpose as a daemon using systemd on Linux.
Support
Reach out to hello@localxpose.io if you have any issues.
Join thousands of developers who rely on LocalXpose to secure their home automation, IT tools and security systems.
Free plan available • No credit card required