This tutorial assumes that you have created Stripe account & have access to your dashboard.
1. Creating a simple webhook receiver
Here we use flask to create a simple webhook receiver, If the webhook receives a POST it will respond with a message. The flask application is set to run in port 8080.
Ideally, you would want to write statement for handling the events and exceptions with return codes.
from flask import Flask, jsonify, request
app = Flask(__name__)

@app.route('/', methods=['POST'])      #You may add other route eg: '/webhook'
def webhook():
    data = request.get_json(silent=True)
    print(data)                        #Prints payload
    return jsonify('Yey! Success')     #Returns happy message

if __name__ == '__main__':
    app.run(port=8080)                 #Running on port 8080
You can then run your code.
python stripe_webhook.py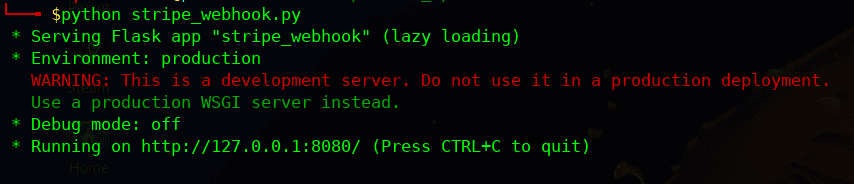
this flask webhook app is meant for test use only, in production you would want to follow best-practices (opens in a new tab).
2. Exposing your stripe webhook
Since our webhook is running on port 8080, we can now expose this port with LocalXpose. If you want to use custom domain please visit (creating a custom domain).
loclx tunnel http  --basic-auth stripeuser:stripepwd
# also using in-built basic authentication feature (Optional)
LocalXpose should provide you with http/https tunnel endpoints.
3. Register a webhook
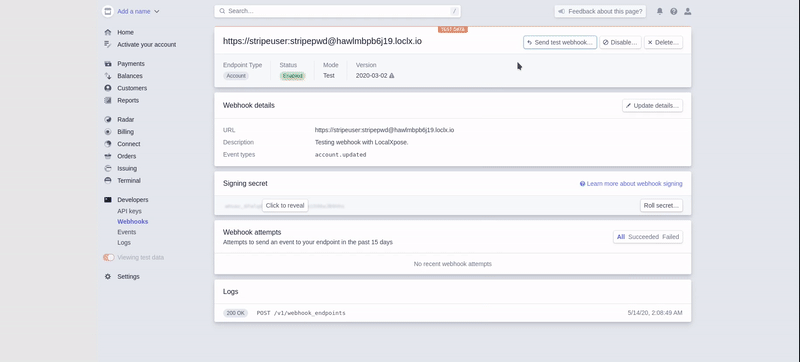
Head over to Stripe Dashboard (opens in a new tab) and click on Developers > Webhooks.
- Click on 'Add endpoint'.
- Enter your LocalXpose URL in format
https://<username>:<password>@<localxposeurl> - Select event/s you want to generate.
- Save by clicking 'Add endpoint'.
4. Triggering Events (Dashboard)
In order to test the working of your setup, we can trigger webhook events.
- Click on 'Send test webhook'
- Select the event you want to trigger.
- Confirm by clicking 'Send test webhook'
You should see the return message from our webhook 'Yey! Success'.
5. Triggering Events (CLI)
Follow these (opens in a new tab)instructions to setup Stripe CLI in your machine.
i) Login to your stripe CLI.
stripe login
> Your pairing code is: gems-pretty-holy-honor
> Press Enter to open up the browser (^C to quit)
ii) Create a forwarding listener
stripe listen --forward-to https://stripeuser:stripepwd@hawlmbpb6j19.loclx.io
# Ideally you would want to setup a listner in server, but if you can't, you can
# forward using localxpose's url to forward webhook events like such.
iii) Create a webhook event
stripe trigger payment_intent.createdYou should receive the event and it will be forwarded to your webhook.
In this way you can expose your webhook and test against with Stripe's events. For developer's documentation refer to stripe official docs (opens in a new tab).